High Chairs Transformed

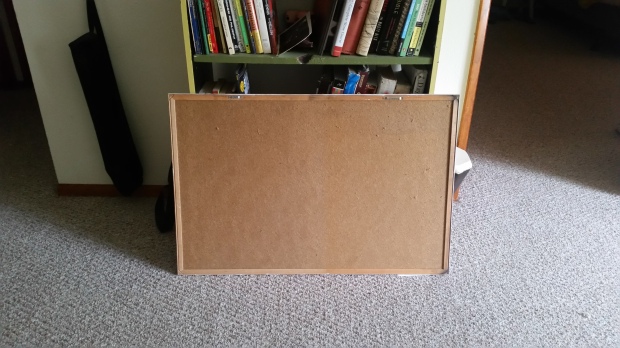
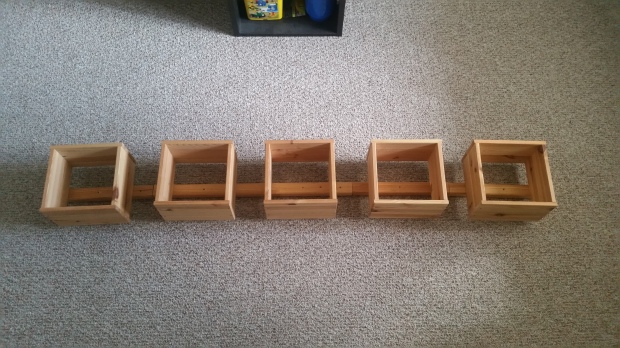
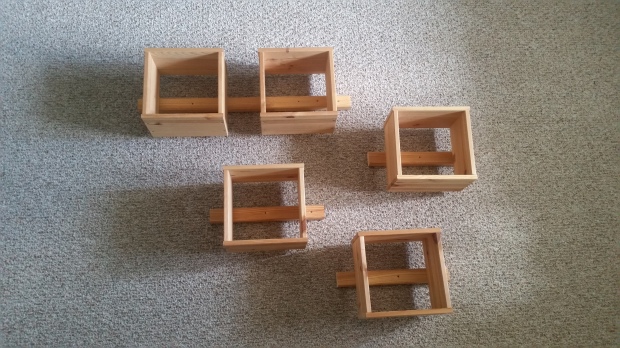
These are the high chairs that have been ruling my life for over a week. My husband’s boss asked if I do it for him. Of course I would! This week I’ve been on an unpaid vacation, so I have loads of time. Plus it allows me practice my new favorite art without having to purchase more pieces. Yay for practice! These are the original chairs, very gross and surprisingly wobbly.
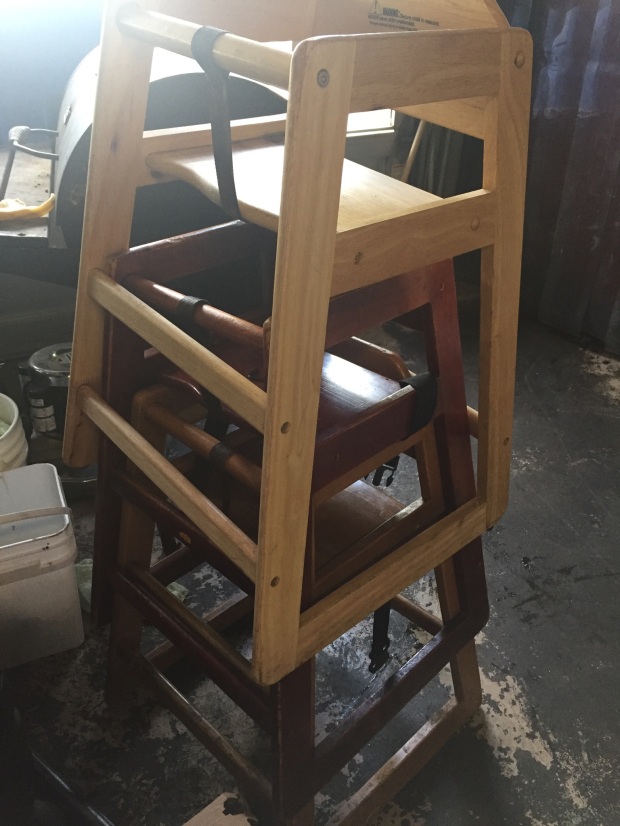
img_86981.jpg

Old and gross

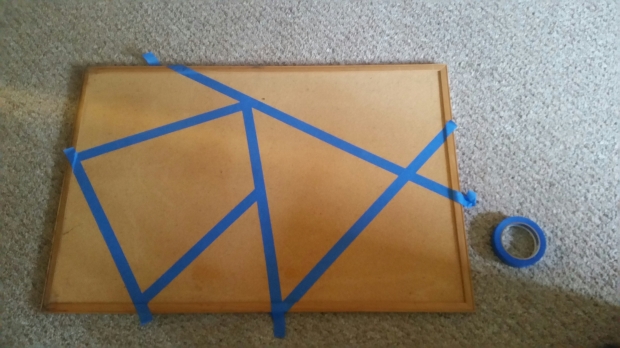
What took the longest and, of course, was my least favorite part, the sanding. If I continue to do these projects, I will need to invest in an electric sander. I’m not sad about that, I love new toys. Especially when they are useful. Anyway, after a shit ton of sanding all the pieces were finally ready. It took me a full day to figure out what I wanted to stain on the chairs. I turned about 10 ideas around and around in my head but eventually settled on: sea life, mountains, and flowers.

DSC_0159

In my head I wanted to make them very elaborate, but I didn’t have time and looking back on this experience I realize that it probably would have been very frustrating. I decided to just stain the seats and backs. This is where any staining would have the most impact, in my opinion.

The sea life chair is the most simple I think. I am not very good at drawing animals, so I figured starting with animals that are a bit amorphous and blobby. The octopus is spreading her tentacles around the seat and bit underneath. The tentacles gave me a good amount of practice to fill specific space and leave very little negative space. I wish I could have come up with a way to create tentacles. I think I could have with a second, lighter stain color. Something to think about. I love the whale, he is adorable! And the jelly fish was inspired by me watching Finding Nemo with my students a few weeks ago. Come to think of it, the whale might be too.

DSC_0176

I let the jelly fish dry so I would not smear the darkened stain of its tentacles

The mountains were inspired by my new friend Bob Ross. I have been watching him since the powers that be added it to Netflix. I honestly do not know if I could ever paint like Bob Ross but I certainly love to watch him.

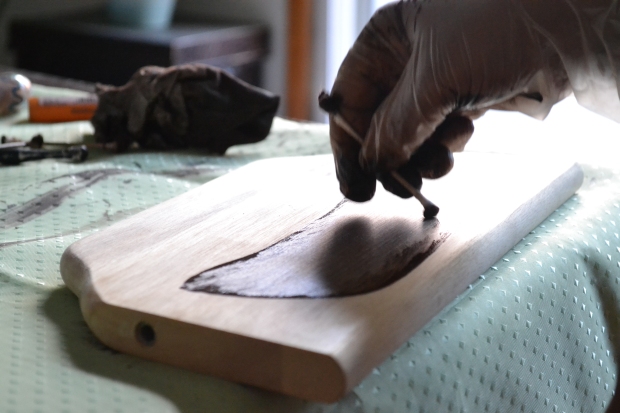
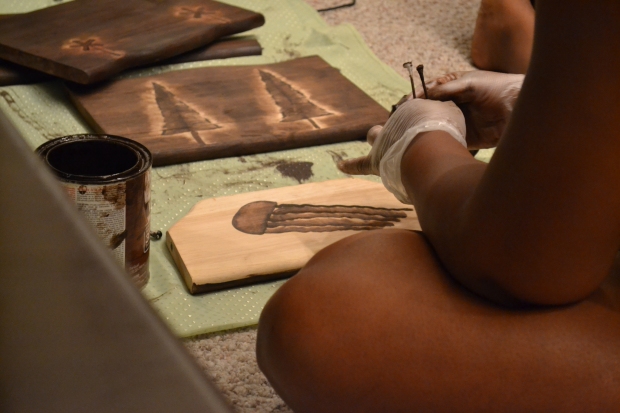
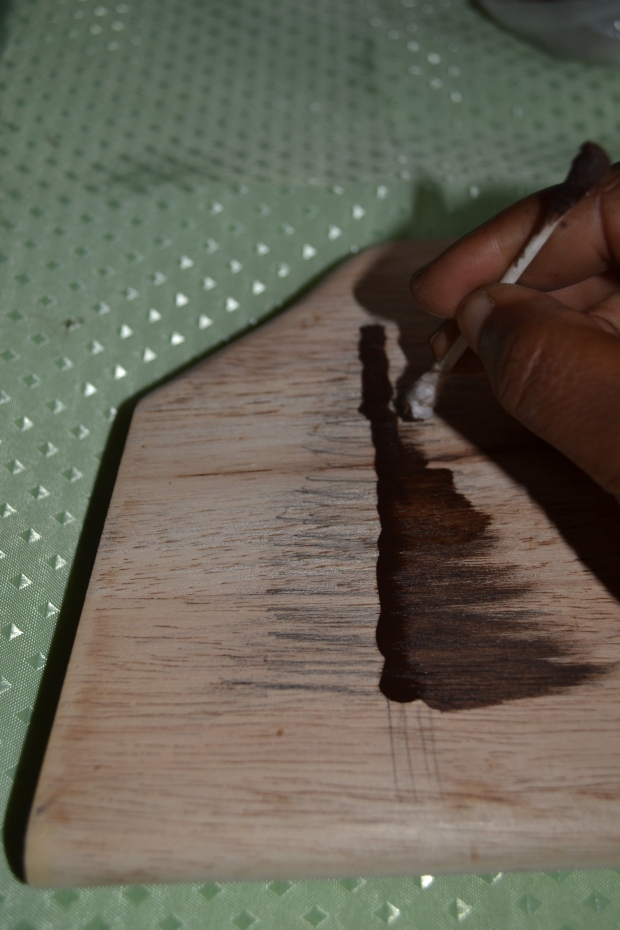
The mountains were pretty easy after I thought about it for a bit! I used a q-tip to spread a thick layer of stain then used the dry end to spread it out. Then I used my dryish stain cloth to fill in the middle. I did a similar thing with the tress and then went back with a pointed tool to create definition. I think I could create a whole scene like that, maybe with a lake and more definition in the mountains. The trees were made the same way. One smear up the middle and then use a dry tip to spread it in the direction of your choice.

DSC_0129

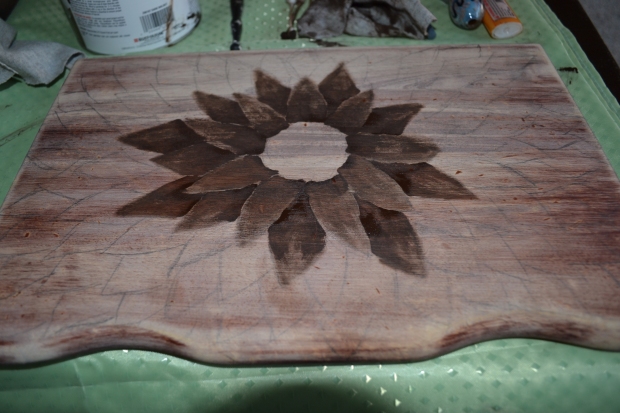
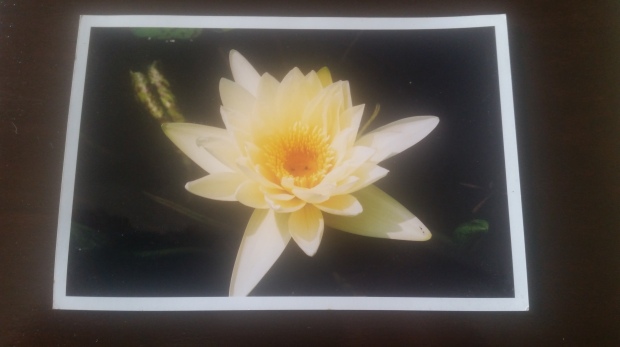
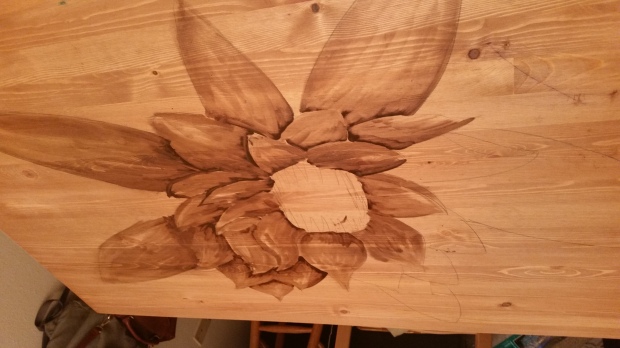
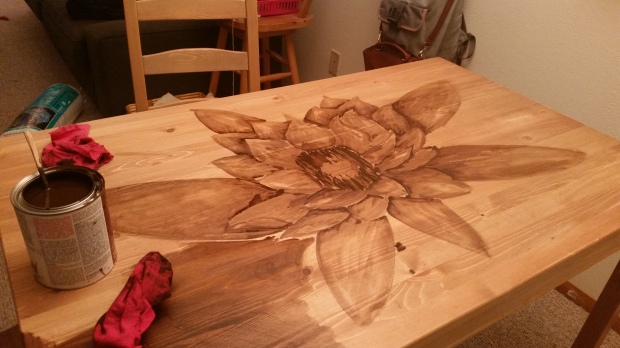
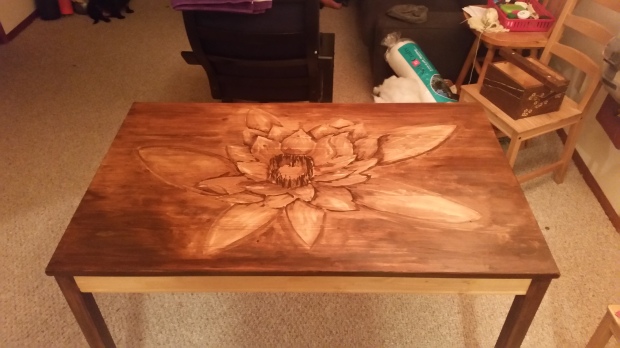
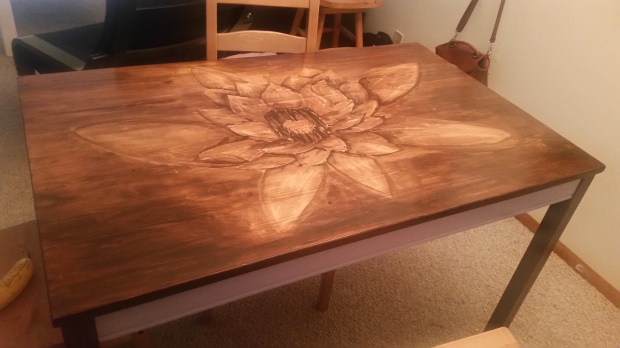
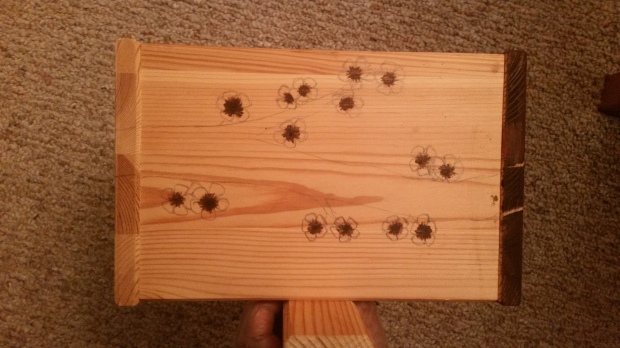
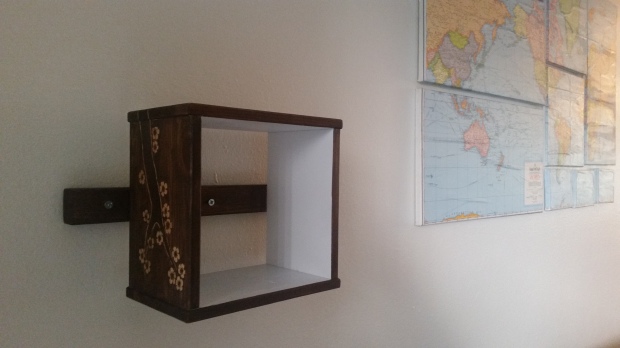
The flower chair was a labor of love. It took forever! Each petal had to be relatively contained to create space between each of them. I drew a line at the base of the petal and used a dry tip to spread it make a cone shape. Then repeat about 50 times. Definitely my favorite chair. It is the most visually striking.

DSC_0144

Even though this took longer than I expected, I enjoyed immensely. It was the experience and practice that I wanted and hopefully it makes someone smile.


Beer and Food Vegan Style

This past week husband and I went to the Vegan Beer and Food Festival, yayyyyy! It was a good time filled with so much beer and some of the most delicious vegan food I have ever had. Actually I think that I loved the vegan food more than the beer, but that’s not that surprising. Food and I have a very delicious relationship. The tickets were $45 each and came with 40 beer tickets that was pretty much the only price if you were drinking. I figured that the pours would be the typical beer fest pours, barely 3 oz or closer to 2 oz. These pours were about 4 oz. Right away I knew we were not going to get through all 80 tickets, plus husband found like 15 more tickets sitting on top of a trash can.

DSC_0049

My favorite addition is at the top left corner

Back to the beer. I tried most of the beer available, there were maybe 25 breweries. The only reason I did not or could not taste them was because the lines were super long when it was 40 min to last pour (and my stomach was full of delicious food and beer) OR the brewery was out. Some of them were out when we got there at 2:30, it start at 1p. Lame!

DSC_0015

I tried to keep notes of the beers I drank but the more I drank the more useless my notes  became, go figure. Here are the beers I tried:


DSC_0014

Next time I’ll hire a scribe

  • Montavilla Brew Works – Hoppy Blonde Ale
  • Sasquatch – Vanilla Bourbon Cream
  • Sasquatch – India Session Ale
  • Burnside Brewery – Lime Kolsch
  • Gilgamesh – Tropic Blunder
  • Schooner Exact Brewing – India Session Ale
  • Logsdon – Kilwit
  • Logsdon – Czech and Brett
  • Chetco – Effect Summer Ale
  • Drinking Horse Saison
  • Calapooia Brewing – Chili Beer
  • Boneyard Pale Ale
  • Elysian – Blood Orange Pale Ale
  • Crux Pilsner
  • Watermelon IPA from somewhere I didn’t write down but it’s the only IPA I’ve really enjoyed

My least favorite beer was the Calapooia Chili Beer.Ugh, so gross and not for me. I love spicy food but spicy beer is now in the NO category along with sour beer. My favorite beer was the Drinking Horse Saison. I love all saison beers because they are my absolutely favorite and bars rarely carry them, so this one jump to the top of my list. It was super flavorful without being to powerful with a slightly sweet finish. Lovely.

DSC_0042

Wear your tails, loud and proud


The most surprising beers were the India Session Ales and Burnside’s Lime Kolsch. I had never tried these types of beer before and found them very delightful. The ales reminded me of a thin beer with a light, slightly fruity flavor. I would definitely drink them with pizza or a burger. Heavy food with a light beer. The kolsch was so limey! It was a bud light lime times a hundred. A prefect beer to enjoy pool side or on the beach.

The most unforgettable beers were the Vanilla Bourbon Cream and Tropic Blunder mainly because they were very sweet. The tropic blunder literally tasted like fruit juice beer, I could drink it with breakfast. The vanilla beer was definitely creamy and sweet like a vanilla flavored coffee concoction.


Now for the food. The food stands that stood out to me were Cycle Dog and Garden Grill. Cycle Dog was the first one I gravitated towards because the line was non-existent and I was hungry! I was rewarded with the best vegan dog I’ve had! Sadly they are based out of Seattle (I think) but I would definitely hit up this food truck. Garden Grill, also based out of Seattle, had the best friend vegan chicken sandwich that my mouth has ever has the pleasure of meeting. It tasted and had the same mouth-feel of real chicken with a crispiness even the colonel would covet. Also the bun was glazed just like a donut.

DSC_0115

Drunk, full and happy

Overall, I really enjoyed myself and it was a nice way to start off the summer. We have 2-3 more beers and/or food fests to go to, so it’ll be interesting comparing them all. I think I would go next year if I could purchase tickets separately. We’re definitely having more beer and food adventures as the summer continues. Now, back to crafting!!!!


Turtle Trinket Bowl

A while back I found this weird looking turtle at a Goodwill. Something about it just spoke to me plus it was only $2. Husband suggested that I buy it and try to make it look better.

Of course I never turn down a thrift store challenge and the turtle came home with me. Now this thing sat on my dresser and desk for longer than I care to admit, just gathering a lot of dust. I was avoiding the hardest and most annoying part of any woodworking project…..the sanding. I dislike sanding with the same amount of passion I have for raw onions, a little bit is fine but too much and I won’t enjoy my meal. But sanding IS a necessary evil that makes the final product not look like shit you found by the road side. So sand I did. For about two hours.

wp-1465410137584.jpeg

The most difficult part was the shell, the flower edges were carved in and not evenly. The more I sanded, the more I realized that someone carved this from hand. The shell is uneven, the feet are not all the same size, and the oval on the inside is a bit lumpy. That made me love this little turtle even more. Someone had the good sense and skills to carve him (hopefully not as a present that the recipient just gave away!) and I do not want it to go to waste.

I wanted it to look like a turtle, not just a carved turtle with some random design on its back. I sketched out the scutes, or the little plates on the turtles shell, and decided to just stain the rest of the turtle a rich brown. For each scute, I used a q-tip to make one line of stain. At first I used a cloth but I couldn’t see very well and it forced me to take my time. I am notorious for rushing through a project when I get to the final stages. Anyway, I made a line of stain then used the clean side of the q-tip to spread it and get the fade affect.

Originally I was not going to add the white but it looked like something was missing. Something to help give this flat shell some dimension. I used simple acrylic paint because I have so much on hand and it dries quickly and spreads easily. Looking back, I think I would have done the white first THEN stained the scutes. I thought of this when I finished adding the white, so I went back again to add a little bit more staining and I outlined part of the scutes. The picture below is of me very messily added the white paint.

Overall, I think it turned out quite nice! This little guy is going to be sold on my Etsy page, check it out along with my other items.

wp-1465410086324.jpeg   wp-1465410303249.jpeg


Adventures in Staining: A Better Table

I finished my table last weekend! Well I actually finished it during the week before and after work. Which was actually really nice because it forced me waiting between layers so they could dry properly. So this is the boring Ikea table.

wp-1464073150829.jpeg

Husband and I have had it since we moved to Portland, so it had a few scratches, pen marks and water rings. It actually didn’t take me long to sand it. That is what I love about about unfinished furniture, there is no need to scrap off paint or use 6 different grits. I wanted to do a lotus but couldn’t decide on what style. Husband presented me with a beautiful picture that either he or a friend took at a botanical gardens of a true lotus.

wp-1464803853321.jpg

Exactly what I wanted! I drew out my lotus on paper and then drew it on the table. I know it’s not a whole picture but the outline is hard to see unless the camera is close.

wp-1464073170330.jpeg

Notice that it is only a simple outline. I am not much of an artist, so the less detail the better. I make all my detail with the stain. I was so nervous to start! This is probably one of the biggest projects I’ve done. I did not use a paint brush, only a old shirt. My mom said its the best way to stain wood.

wp-1464073189231.jpeg

I did not start with the center because I knew it was going to be the thickest stain and I didn’t want to smear it with my arm or the cloth. Each petal was stained individually to create some definition. The stain will be darker the longer you leave it on, but I also went back as the petals dried and outlined a few of the petals with lines of dark stain. I put a smear of stain at the base of the petal and then with a dry piece of cloth I spread out the stain. Maybe I will put up a video from my next project. This technique works with any stain color, I just happen to have a can of a dark color.

wp-1464073211720.jpeg

For the center I used my pointed clay tool (or toothpick) and kept the stain dark to create the center. Surprisingly the table top took me only about an hour to stain as opposed to my shelf that took two hours to stain. After finishing the flower first, I started to stain the background, then I stained the legs.

wp-1464073264866.jpeg

I added about 3-4 layers of stain to make the edges of the top darker. The legs I also stained a few times. I absolutely love how the table top turned out. Its fluid, dynamic, and looks like the lotus is floating in water.I taped off the stained wood and primed the sides. After thinking about four different colors (all bright), I settled on a light purple. It really finishes off the piece and doesn’t compete against the lotus.

wp-1464803239620.jpeg

I sealed it with about three coats of clear coat. Hopefully it is as anti-scratch as the can proclaimed. I think this turned out really lovely and I cannot wait to do more. Look there’s my banana!


Adventures in Staining: Part 1

So I have fallen hard for a new diy this past weekend. It’s staining wood! I had never tried it before because I always wanted vibrant colors in my furniture. Now that I have vibrant furniture, I want something to balance it out. Hence the wood stain. I scoured Pinterest for a bit and then remembered the perfect pin. It is this blog of a woman who makes beautiful images using wood stain. Found here. I guess I really wanted to try it because I pinned it twice. (I have so many double or triple pins from projects I’m dying to try, ha ha!) I was so nervous about doing this project until my husband kindly reminded me that if it looked bad, I could just stain the whole thing. Truth. 

wp-1464073150829.jpeg

My goal is to make this plain Ikea table into something interesting and visually appealing. I wanted a trial run first and for some reason I decided that I would make it way more difficult than it needs to be. About a month ago, husband and I ventured to Goodwill, as usual about about twice a month, and I found an Ikea shelf. -We happen to find a lot of Ikea furniture. About a week ago husband brought home a pretty nice Ikea chair that someone left by the dumpster.- The shelf itself was ridiculously heavy and awkward. we definitely did not have a place to put this thing on any wall.

wp-1464072828606.jpeg

I had husband cut it up into four pieces. Now they are much more manageable from a design standpoint and each piece can fit comfortably just about any where in the house. My first box I decided to decorate with cherry blossoms.

wp-1464072865257.jpeg

I drew it out on a piece of paper and while I didn’t follow that pattern exactly it gave me a great jumping off point. I highly suggest you do the same. Unfortunately I forgot to take a picture of it before I used it under my paint can. Anyway, sketch your design on whatever you are painting first. I’m not an on-a-whim artist when it comes to big projects like this, I have to have a plan. Sometimes not having a plan works out but usually it doesn’t.

Here are my drawings, not the best but it doesn’t have to be. I’m not displaying my drawing. Pretty simple as you can see or so I thought. I started with the flowers and stained the middle. I tried using a cloth to stain but my fingers weren’t small enough. So I started using a pointed clay tool basically a fancy toothpick. I placed one little drop of stain in the middle and then used the tool to spread it out from there. The longer you let the stain sit, the darker it is and the easier it is to get the stain gradient you want.

wp-1464073026797.jpeg

I know the gradient is a bit hard to see on this picture and the picture looks like a bunch of raisins on a piece of wood. I stained the tree branch next. For the parts where my fingers were too big I used a Q-tip. I actually used several Q-tips. This is what the final product looks like.

This slideshow requires JavaScript.

Some sides are better than others but I love it. It adds a really nice accent to our wall. Now I have to decide what I want our boring table to look like AND I need to figure out what to do with the four other shelves.

wp-1464229096527.jpeg

Body Butter to Soothe the In Laws

I love my mother in law, she is the sweetest peach on Earth and she was also one of the first to buy something from my Etsy store back in November. One of the items that she purchased was body butter and she ran out right around Mother’s Day. Which I cannot believe because I go through my body butter like I go through ice cream. Delicious for my skin (taste buds) so I use (eat) a lot every day (so it only lats 3 days). Anyway, she requested more and she shall receive, for free of course!

Now there are a ton of body butter recipes out there and I am sure each one makes a luscious butter to hydrate your skin. Every time I make body butter, I do it a little differently and sometimes that makes a world of difference. So I think it’s safe to say you can combine any set of body butter ingredients and come out a winner. As long as it’s all natural and hydrating, its safe for your skin. I rarely use regular lotion and ever since I converted my skin is fabulously soft and the ingredients provide (supposedly) a bit of sun protection. Also my dogs love it. Whenever I lotion up after a shower, here they come sniffing and licking at my legs.

The main ingredient in my body butter is shea butter. It is the raw fat from a Shea Tree nut found in Africa. Apparently some Africans cook with it, I wonder what the taste would be like? Shea butter is amazing for:

  • dry skin
  • rashes
  • eczema
  • cracked skin
  • sun burns
  • insect bites

Not only do I use this in my body butter, I also use it on my one of my dogs continual rashes and insect bites. Of course he licks most of it off, but that problem is easily solved with a cone. This is Fraiser (like the show), he is one of two, and this is how he gets his naked, little tummy bitten like crazy by bugs.

2016-05-18-21.41.01.jpg.jpeg

Coconut oil is my next ingredient. I feel like the US has exploded with coconut oil in the past year. We use it for cooking, body butter, and in our homemade toothpaste. Coconut oil is great for:

  • soft skin
  • eczema
  • cracked skin
  • whitening teeth
  • prevent bleeding gums and tooth decay (tested and approved)
  • makeup remover
  • chapped lips
  • dry hair

And the list goes on. Basically coconuts are a fruit of the gods amazing for your body inside and out. Are you noticing a pattern yet? Next up is vitamin E oil. It’s the kind you find in a bottle and not a pill. The bottle form is not pure vitamin E, it is usually mixed with a carrier oil. Only a small amount of this oil is needed. Too much and it seems to make the butter oilier, to me at least. But its benefits are great support for the sea butter and coconut oil. Vitamin E oil is perfect for:

  • moisturizing
  • helps prevent water loss
  • (supposedly) healing scars and sunburns
  • detangling hair
  • chapped lips
  • reducing nail breakage

My last two ingredients are completely optional, cornstarch and essential oil. The cornstarch helps to reduce the over all oiliness. I’ve made it with and without, and definitely prefer the with version. It is constantly warm in my house (much to my husbands chagrin) because I refuse to turn on the A/C or heat unless absolutely necessary. Luckily our current place is well insulated so it keeps the house at a nice lizard temperature as husband calls it. Anyway, the warmness in my house combined with the warmness of a post-shower bathroom equals a slightly, liquidy body butter. I found that the cornstarch helps to contain the oil and gives it a certain amount of hold. The essential oil is all up to you. My mother in law loves lavender, so she is getting lavender. I’ve made body butter with many essential oils but also coffee, cocoa and cayenne pepper. The coffee was an experiment to see if the caffeine went above and beyond in helping scars and rashes. I don’t think it made much of a difference but it did up my coffee habit when I was using it. The cayenne pepper produces a spicy body butter that tingles after you put it on and helps your muscles relax. I use this one almost every night to relax my calves and it is great to put on right after a hot shower or bath. It is super simple and only involves one extra step and an old shirt.

Ingredients:

  • 1/2 cup of raw shea butter
  • 1/3 cup of coconut oil
  • 1 tbsp of vitamin E oil
  • optional – 1 tbsp of cornstarch
  • optional – 15-20 drops of essential oil
  • optional – coffee grounds, cocoa powder, cayenne powder

Materials:

  • double boiler OR sauce pot and metal bowl
  • container for final product
  • optional – cheese cloth or old shirt for the alternative scents

Fill your sauce pot about half way with water and set to low boil. Once simmering place the m20160508_145344.jpg
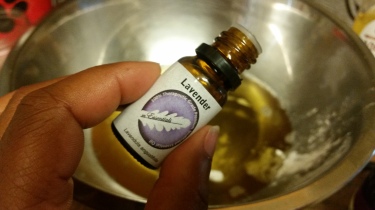
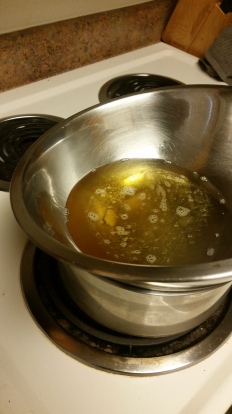
etal bowl over the pot. The bowl should not be touching the water. Double boilers gently melt through the steam of the heated water. Add your shea butter and coconut oil and let it melt. You can definitely help it along by stirring it. **This is where you would add your coffee grounds, cocoa, or cayenne. Allow these spices to sit in the shea and oil for about 5-10 minutes. The longer you let it sit, the more intense the scent will be. After you add the cornstarch and vitamin E, you will need to strain out the grounds/spices with cheese cloth or an old shirt.**

20160508_150126.jpg

Once melted remove the bowl from the double boiler and set aside. Add the cornstarch and vitamin E oil then stir until the cornstarch is completely dissolved. Finally add in your essential oil and stir. **This is where you would strain the liquid from the grounds/spices.**

Pour into your container and place in your fridge for a few hours to solidify. Remove and enjoy! I made a fancy label for mine. I used a coffee cup to trace the circle and after decorating I applied the label with clear tape the cut off the excess with an x-acto knife. I think clear contact paper would have looked cleaner but I am  big advocate of using what you have already rather than constantly buying new.

wp-1463681591111.jpg


Colorful Corkboard

Not long after we moved to Portland, my husband found a very crappy cork board in a dumpster. He does this every once in a while and we’ve gotten a few good pieces like our bookshelf. So I definitely like it when he brings home a random piece of junk. Anyway, this cork board sat in the craft room for few months while I tried to think of something to do with it.

20160503_112053.jpg

At first, I thought about using fabric or ribbon but the fabric I have is not suited for it. I am trying this thing where I cannot buy new decorative products for a project. For example, I can buy more glue or paint brushes however I cannot buy patterned paper or shiny accessories. I feel like I buy so many things just because its new or interesting looking, but then it just gets added to a drawer and forgotten about. I’m sure the same thing happens to you too. I finally settled on painting it. Plus painting has a nice way of blending in the chipped parts of the cork.

2016-05-03-11.15.17.jpg.jpeg

I wanted something interesting but not too busy. What is the point of painting a beautiful piece just to have it covered up by vet reminders and random mail. Hence my geometric pattern, it is simple, eye-catching, and bright (with the right colors). Blue painters tape is my best friend when it comes to these projects, I always have a roll in my house.

20160423_174301.jpg

The cork board was taped off and painted using acrylics with a sponge brush. My first pass on this yielded ugly results. I somehow decided to use orange, pink, light blue, dark blue, purple, and red which resulted in a cork board straight out of 1995. So I regrouped and decided to go with a purple/blue scheme. For the dark colors I only had to put on 2 coats, the lighter colors required about 4 coats. After letting it dry, I tore out some magazine pages and slid them between the cork board and its frame. There were SO many coats of white paint added to the frame, probably around 8 or 9. Luckily each coat dried quickly.

20160426_101537.jpg

It turned out better than I expected and goes wonderfully in the hallway above our bikes 🙂

wp-1462299770279.jpg


Sparkling Star In Progress

I am a hoarder of craft supplies. Full disclosure. It started as soon as I got my first apartment. I buy things here, there and everywhere….all with good intentions and some with great ideas. Somewhere along the line I collected dozens of dowels and recently I found them tucked away in a container. I started tinkering and making shapes with them, eventually I ended up with the two shapes a Christmas tree and a giant star. The tree is OK, but not my favorite. I absolutely love my giant star though! My very sweet husband helped me out by using a Dremel tool to angle the points. With a little hot glue, voila!

DSC_0022

Since it was only hot glue and sticks, the star was pretty flimsy. I slept on it to figure out the best way to reinforce my star. I settled on paper mache, its cheap and easy to do.

So I gathered my  building materials:

  • newspaper
  • masking tape
  • paper towels
  • paper mache paste

First I added some body to my star. I wrapped and taped newspaper all around my star.

DSC_0023

Now its time to mix up the paste. I loved doing this as a kid and have even made a pinata.

  • 1/2 cup flour
  • 2 + 1/2 cups water
  •  1/8 cup glue
  • spoon
  • mixing bowl
  • pot and stove

Paper mache paste is simply a 1:4 ratio of flour to water. First set the 2 cups of water to boil. (You might notice that I added an extra half cup of water to make this slightly higher than a 1:4 ratio, this is to account for evaporation during the boiling process) While you wait, mix together the 1/2 cup flour and 1/2 cup water in a bowl until it looks like a batter, then set aside. Once the water is at boil, take it off the stove and add it to the batter. Stir carefully until fully incorporated, then mix in the glue. As you mix it should cool down quite a bit. Now for the fun part!

I did two layers of paper mache. My first is paper towels. I think that it helps to smooth out the ridges and valleys from the taped newspaper. Since newspaper is a little stronger and more rigid than the paper towels, I used it as my second layer.

DSC_0024

And now I wait! After it dries overnight, I will re-evaluate and decide if I need to do another layer of newspaper to ensure smoothness. The endgame is to spray paint it white and attach lights. I am still deciding how to hang it. At first I envisioned creating a hook with wire and hanging it from one point. But now ideas are floating in my head of making a wire design for the middle with a possible mirror in the middle or a few pictures…..at least I have another night to think about it. I would love to finish this in a weekend 🙂

Space Invaders Key Holder

This took absolutely forever to finish! But I am finally satisfied enough to post it for sell on my Etsy page.

space invaders

This is an upcycled piece. I love upcycling, repurposing, salvaging…..what ever you want to call it. We live in such a throw away society, if it broken or not your taste, just toss it out and get a new one. What’s the fun in that!?

Anyway, this piece took probably a total of 3 hours of actual work, not including drying time and getting distracted. I am lucky enough to have a Cricut that I used to cut out the vinyl pieces. I know I would be able to paint on all those little squares but my perfectionism would mean I would work on it for a life time! Below are directions of how I upcycled an ugly thrift store piece in something sellable.

space invaders 3

Key Holder Tutorial

1: Sand and prime your board. This is my least favorite part but the most important.

2: Use a Cricut, Silhouette, or an X-acto knife to cut out your vinyl space invader pieces. I had to look up what the actual game looked like to get the best and easiest representation.

3: Apply your pieces then paint the board black. I used a acrylic paint for this project because it’s what I have on hand. However, spray paint certainly makes this part easy.

4: Take off your vinyl pieces and use paint to touch up.

5: Spray with a clear sealant.

6: Screw in you hooks and hang!

space invaders 2

Try this with something whimsical like a starry night or flowers in the meadow! Don’t forget to paint the board the color you want first.

Swirling Sensations

Lately I have really enjoyed making sets of tile coasters, I love how they look, their sturdiness and ability to withstand being soaked through.While I was planning for a painting project for my class, a brilliant idea struck me, why not try a technique on tile! How to make these are super simple but require patience!

wpid-20151023_152620.jpg

Materials:

  • Mod podge or regular school glue (I make my own mod podge – simply mix water and glue in a 1:1 ratio, stir and enjoy!)
  • Tiles
  • Four felt circle bottoms – I got mine in the furniture section of Target, I do not recommend using craft felt
  • Acrylic paint
  • Toothpick, sharpened pencil, or pointed item
  • Scrap paper for drying
  • Small item to elevate the tile while it is drying – my partner plays D&D, so I used some of our many dice
  • Clear spray sealant – I used Krylon

DSC_0061 (2)

Step 1:

Set up your work space! Taking the time to do this in advance, allows for the best drying and least amount of mess. Stack the blank tile(s) on your small item to elevate it above the scrap paper.

Step 2:

Add a good swirl of glue/mod podge to the tile. The glue will spread so there is no need to glop it on. The point is to create negative space when the glue dries clear.

DSC_0062

Step 3:

Add 1-6 drops of your acrylic paint. In my final project, I used one drop of yellow at two separate corners and 3 drops of purple diagonally.

DSC_0063 (2)

Step 4:

Use your pointed to swirl and move the paint and glue together! You can create beautiful swirl patterns and abstract shapes with it! You want to have a good amount of glue and paint obviously present on the tile. Once you are finished swirling, the glue and paint will keep spreading, you can either (a) let it drip down the sides or a more organic/natural look or (b) take a wet cloth or paper towel and wipe the sides as the glue mix drips down. Both options turn out great.

DSC_0064

Step 5:

Let it fully dry before your touch it. I recommend a full day (AM to PM) or overnight. I have to do this project in the late afternoon, so I can set it aside to dry overnight. Its like waking up to a present. Plus, I like to touch all the things!

Step 6:

Once its dry, add your four felt circles to the bottom of the tile. Mine were self adhesive.

Step 7:

Follow the directions on the clear sealant. I did 3 coats, letting them dry for 1 hour in between coats.

Step 8:

Enjoy your hard work with a glass of wine!

wpid-20151023_152620.jpg